Showing posts with label Christmas Crafts. Show all posts

Thursday, January 9, 2014

Elf Movie Painted Bathroom Mirror

Oh, hello there!  I'm back from all the Christmas shenanigans and ready for a new year of awesome crafty goodness for this blog but I had to share JUST ONE last Christmassy fabulousness with you guys, and it's a good one so I think you'll appreciate it.

I may have mentioned a time or two how much I love the movie Elf.  It's a total Christmas fave in our house and I actually couldn't even tell you how many times we watched it this season now that my girls aren't terrified of the raccoon hug and Central Park Ranger's scenes :)  My favorite part, being the random lover that I am, is Mr. Narwhal.  Bye, Buddy, hope you find your dad!  Seriously, that phrase might fall out of my mouth when leaving anyone anywhere at least on a weekly basis year-round (I know, I'm so cool sometimes!).  

So, this year I decided to amp my annual ugly sweater party up a notch and make it Elf themed.  So in a desire to insert fun elements of this movie all over my house I got the brilliant idea to paint my own favorite, Mr. Narwhal, on my bathroom mirror.  I am NOT an artist, but he's pretty basic shape and I knew if I looked at a picture I could probably figure it out!  PLUS, here's a fun tip if you want to give mirror painting a try: practice or outline your shapes with dry erase markers!  

I used cheap tempera paints from Wal-Marts craft section (less than $2 a large bottle that will probably last me forever!!) in blue, black, and white!  I mixed a little of a light grayish blue for the narwhal and some icy blue for the water.  


So fun, right??  I've "frosted" the bathroom mirror before last year, but this took it to a whole new level, and seriously, I don't know when I'm going to get the nerve to wash him off :)  (soon-ish, I promise!!).  But I can't wait to maybe paint up a different holiday movie favorite next year . . . or next birthday or holiday maybe?!  Commencing Valentine's Day Mirror Paint Brainstorm!

Hope your Christmas was nothing short of fabulous filled with lots and lots and lots of loved ones and laughter!


Linking up in the Link Party Palooza

Saturday, December 14, 2013

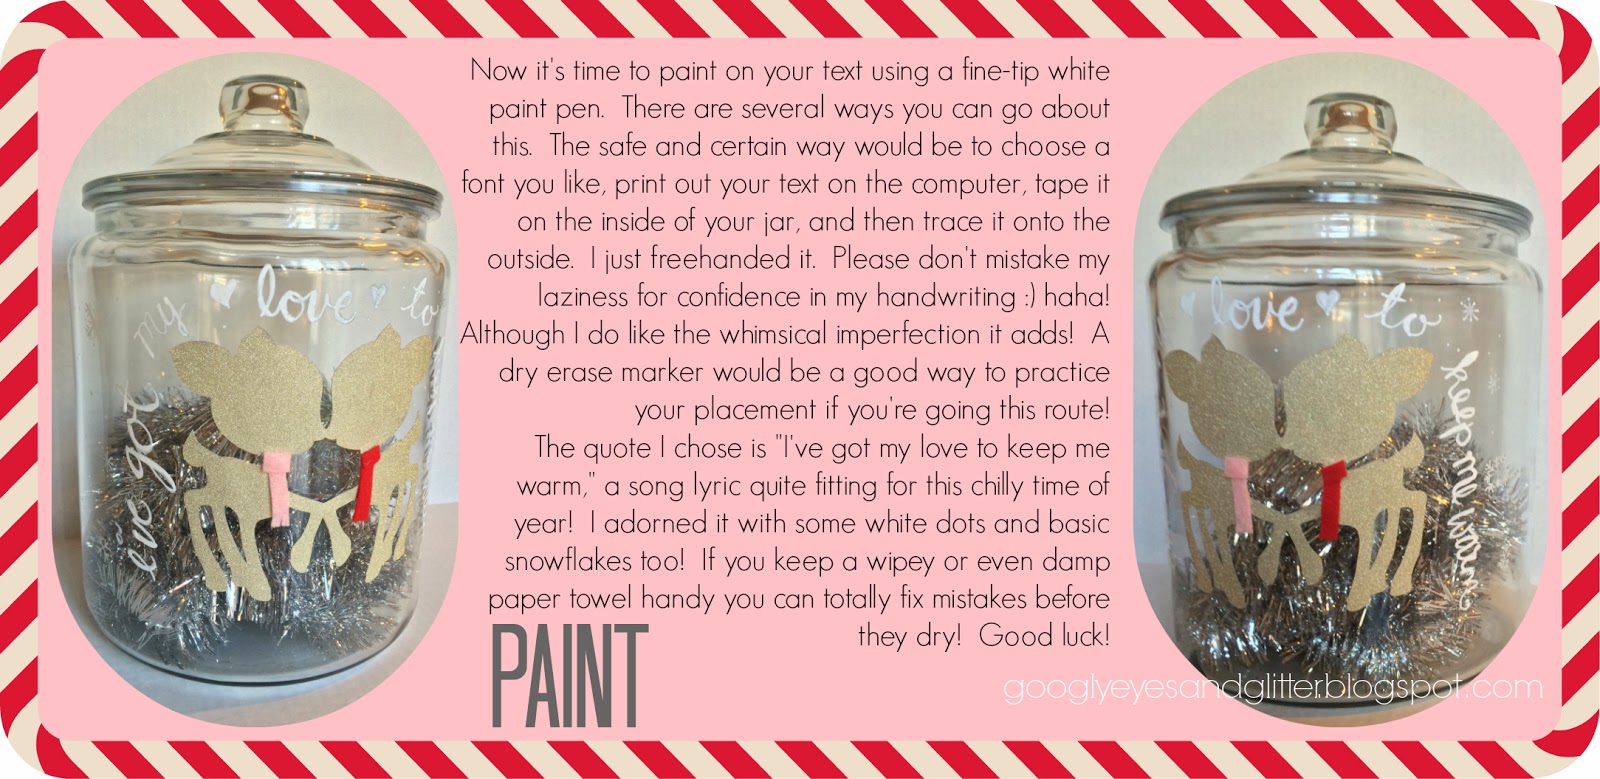
Holiday Glass Canister Challenge: Gloves, hats and mittens jar


Did you totally love Taumi's idea of making an advent calendar in a jar as a holiday-time centerpiece?  

Today I'm sharing my jar creation: a jar full of cozy place to store all those mittens and hats.  I was motivated by our constant loss of mittens and hats here at the time when we really need them.  This would also make a fabulous gift for an entire family as temperatures drop!  


PS, this is the soundtrack song to this project :)  You must listen to it while you make it:
I've Got My Love to Keep Me Warm by Billie Holiday on Grooveshark


Don't have a cricut?  No worries, search "deer template" or "deer color page" and you can use that as a guide to hand-cut the shape from your glitter paper (just fold in half at the nose and don't separate!).  TRUE STORY: you can totally change this up and glue a cheap snowflake ornament in the middle instead of the deer, I came close to doing that myself, but I'm a sucker for deer!


Tuesday, December 3, 2013

Our Advent: DIY Paper Roll Elves

Guess who has 2 thumbs and didn't heed her own bloggity advice about getting her advent calendar completed way in advance . . . THIS GIRL!!  So there I was the night before December 1, sawing down mailing and gift wrap tubes to add to the toilet and paper towel rolls I had begun saving way too late to have the full 48 (although I prefered the variety of sizes so let's just say that's how I'd always envisioned it!!).  Here's the ugly truth about last-minute (or any really) craft marathons:


I had pinned this image last year:  

so I used that as my starting off point.  The pink/red scheme is inspired by Jovie's elf costume at the end of Elf :) 


 I used felt for their clothes, puffy fabric paint for the numbers, and baby socks for the hat (tied in a knot and then snipped off).  Aren't they cute??!


Each little elf is stuffed with a tiny gift to help my girlies count down the days till Christmas!  It wasn't particularly easy to find things to fill such narrow spaces so the mailing tube elves were really helpful.  Here's what it looks like all displayed!  (My husband put up 2 very basic shelves at the girls level using just two boards and 4 small L-brackets).

How are you counting down the days till Christmas?


Tuesday, December 11, 2012

Everything Christmas: "White Box Challenge" Christmas Wrap Ideas

Wrapping the gift can almost as much fun as picking it out (maybe more??).  It's your chance to put a creative spin on even the most store-bought, prepackaged gift!

I saw the White Box Challenge idea in the current Issue of HGTV and thought it'd be fun to rally some creative-minded peeps of my own and give it a whirl.  

So here's the rules:  Wrap a standard shirt size gift box with whatever and however you like!  That's it :)  You'll love these ideas!

First we have Miss Taumi.  She is a sweet artist friend of mine from my college days that lives tragically half way across the country (otherwise we'd be an unstoppable crafty duo!).  I'm pretty certain she's the first person who first turned me onto etsy (epic!) and many of my favorite blogs, including Oh Happy Day!  I have a total style crush on all her amazing fashion and home ensembles, which luckily she shares much of it over at her blog, Loverly.

"I've been obsessed with fringe and tassels since I stumbled on the Confetti System a couple years ago. I even copied some of their fringey ornaments they are selling at West Elm this year so it seemed like the perfect jumping off point for gift wrap. I am not one for traditional Christmas motif wrapping so I found this black and white houndstooth in the party supplies at Hobby Lobby for $4.99. Then I cut fringe from colored tissue paper and made the tassels from the metallic sheets. I used the tutorial from OhHappyDay! for Project Wedding
The No Peeking tag is from Target in a pack of nine for $3. I attached the tassels and tag with fluffy white yarn I had lying around. "


"I started with a photo of my great grandparents from the 70's. I love the orange paisley moomoo my grandma is wearing. There is a little green in it as well as maroon so I used some of those colors in the wrapping. I first wrapped the box in a lime green wrapping that I re-purposed from a gift I had been given (I keep everything!) I taped everything down with black and white polka dot washi tape from Michaels from their Smashbook collection. I layered a paper bag with old-timey adverts I kept (I keep everything!). Tied it up with some hemp twine from Hobby Lobby and added a few triangles I had left over from a garland I had made. The tag is from a pack of nine from Target for $3. "

Next we have my friend, Tami of Wishes of Whimsy.  I lucked out when one of my best friends found and married this girl (2 best friends for the price of 1!).  This lady is a rockstar mama if I've ever known one!  She's a super party planner, craft maker, and even budding bento artist :)  (a woman after my own heart!).  I have been in her house and she actually MAKES the stuff she pins!!! (amazing, right?!?!).  You can see all the fabulous parties and creative family home awesomeness she's constantly taking on over at her blog Wishes of Whimsy.

I had to do a brown paper package tied up with string with several variations:with snowflakes (that stay on my nose and eyelashes), with simple stamp added, then stamps and decorative tape (this is how ours are wrapped this year, I even stamped names onto them!)

Both the wrapping paper and wall decal stickers for this gift are from the dollar store!

 Lastly, I did one for the guys (the ones I know are so bad at wrapping) This is one even they can do: Just a t-shirt box and decorative tape - $.97 at Walmart.

And then there's me, and I only did one :)

This customized package cost less than $2 :)  I made the photo gift wrap by printing a picmonkey collage via Staples Print Center (tutorial here!) for only $1.89.  I dressed up the black and white with some brightly colored yarn strings and pom pom (which I had lying around!  


So there you go, get wrapping!! :) 

Friday, December 7, 2012

12 Nights of Must Watch Christmas Movies: Elf

*I hope no one's counting just how many nights it's taking me to finish this 12-night series, I'm going to try to play catch up today* :P


You know, I resisted this movie so hard when it initially came out.  I thought it looked absolutely terrible and unfunny, my mind was closed to it.  But from the moment I saw it, it became an instant holiday MUST.  I love love LOVE it and I think you will too!

The Movie:
If you haven't seen it (which I doubt, but just in case):  It's the story of Buddy the Elf, who was an orphaned baby that was raised by a Christmas elf and has recently discovered he is actually human and goes to meet his biological father (a grumpy business man who is *gasp* on the naughty list and in great need of some Christmas Spirit).  Full of great music, hilarious one-liners, and heartwarming holiday warm fuzzies, this movie will definitely leave your crew with smiles!

Why It's A Must Watch:
You will instantly find yourself in the Christmas mood after watching!  Also this one bridges all generation gaps so it's great to bust out while all the family is around, it's totally enjoyable for all ages :)

Rating:
Rated PG, this is a pretty family-friendly movie.  There's 1 fart, 2 burps, 1 fight scene, a snowball fight with some school bullies, and a sort of tense chase scene where the Central Park rangers are chasing Santa's sleigh (that's the part that my kiddo was afraid of mostly just due to loud action) . . . that's about all I can think of :)

You're Movie Night:

Prior to watching you can have a Spaghetti dinner (hold the maple syrup).  For snacks while watching, have some Christmas cookies and Cocoa

Craft Idea:


You can make these in about 5 minutes, here's how:
Grab 3 colors of felt (hat, ribbon, feather), some scissors, glue and a dinner plate
First trace your plate onto the color you want the body of the hat to be.  If you have large felt you can trace the whole thing but it won't be a problem at all if you're just using the 9x12 sheets, just get as much of the circle on there as possible (as shown).  Cut out your circle then fold it into 4 and snip along one edge (just a radius of your circle) *if you used the sheet, make sure the edge your cutting is on the side that is missing it's curve*
You can use the scrap edge of your felt as a guide for cutting the hat ribbon (I made mine about 1-2" wide).  Create a cone with your circle and glue together (you can trim any overlapping felt if you wish).  Then glue on ribbon and cut and insert a little felt feather!  
My girls love these hats!


Wednesday, December 5, 2012

Everything Christmas: Countdown Begins (Our Advent Calendar)

So, it's December 5 . . . I'm always late. Nevertheless, I'm essentially thrilled with the outcome and we escaped to Leavenworth this past weekend, so it's okay that our Advent Is starting 5 days late, right?  Right.

I knew I wanted to do an "activity" countdown, where every day has a different Christmas craft, snack, or activity to do.  The problem was just how to display it.  There is a SLEW of brilliant ideas to choose from out there, remember these awesome 10?  But it wasn't until I found this awesome one at Shanty 2 Chic that I knew I'd found my match.

Here's how mine turned out:

Her instructions were super clear and it was actually crazy easy!! *Love when that happens*
*Confession: I made 2 because I sorta hated my first paint choice, so that shows you how quick and easy they are*

I strayed a little from the plan outlined on her website.

First off I used finished boards rather than the furring strips.  The furring strips were only $1.95 a piece but I kinda wanted a smoother sleeker finish (the furring are awesome if you're going for more of the rustic look).  So the boards I bought were $7.96 a piece, but even though that essentially quadrupled the cost, the project as a whole was still only around $30.

Here's the cost breakdown:
2- 1"x3"x8' boards @ $7.96 each = 15.92
2- Bags Wood Clothespins @ $1.97 each = 3.94
1 Can Krylon Glitter Blast @ $6.97 = 6.97
Gorilla Glue and finishing nails (i already had, so not sure on the cost)
25 Pack Chevron Bags $6.25
For a whopping total of $33.08!


**Note: You need 2- 8' boards but you really only use not even 1 and 1/2 so if you buy 3 you can make 2!**

The second adjustment I made was cut the back board at 40" instead of 36"  It's a little taller, so the gaps in between the branches can be a little bigger.  I made 4" gaps from the top of the 2x4 base to the bottom of the first branch and in between every branch from there on up.  Here's a pic of the measurements I did (although you could tweek this to fit your needs, if you want to hang bigger bags or christmas cards I would go even taller and wider with your pieces (and maybe use up the whole of both boards):


I also used the Gorilla wood glue to glue on my clothespins (which I eyeballed for distances apart) before painting.

I left the wood unpainted (2nd time around) and sprayed it with the Diamond Dust shade of Krylon Glitter Blast which is really just a creamy color with crystalish glitter so it just adds a snowy sparkle to the light color of the wood.


I bought 25 pink chevron paper bags from Modern Tape on etsy (yes, pink is a Christmas color in our house!) and they got to me SUPER fast!  I cut out numbers using silver paper and my cricut to adorn the bags.   The activity cards I just made quickly using picmonkey.com (they have some awesome new wintery graphics like the wreath I used).

Here's some of the activities tucked away in those little envelopes:
Christmas Concert, Downtown Light Parade, Trip to Leavenworth, Ice Skating, Sledding, Nativity Craft, Snowman Pizzas, Christmas Movie Night, Living Nativity, Decorating Gingerbread Houses, Making Christmas Cookies, Snowflake Painting, Angel Handprint Craft, and much much more!

 So there you have it!
If you don't count shopping time you're only looking at about an hour, and only 6 cuts with a miter saw!  So I know it's December 5, but you still have time to do this . . . It's not too late!!


Friday, November 30, 2012

Everything Christmas: Jack Frost used our bathroom


I know I'm not the first parent to come up with this idea but it got rave reviews from my kidlets so I'm sorta feeling like a genius at this point and I just had to share.  For about $3 you can transform your bathroom mirror into a snowy wonderland.  I bought the spray flocking snow for $1.99 and a $1.00 snowflake stencil at WalMart.  You should totally do this!


Sunday, November 25, 2012

12 Nights of Must Watch Holiday Movies: How The Grinch Stole Christmas


The Movie:
I don't know if its possible for me to love this movie more.  It's a true feast for the eyes (I want to live in Whoville!) with all the swirls of Christmas decorations and amazingly fun colors!


The is the story of a grumpy old Grinch who's had his fill of Christmas and decides to steal it from the good-hearted Who's down in Whoville.


Why It's A Must Watch:
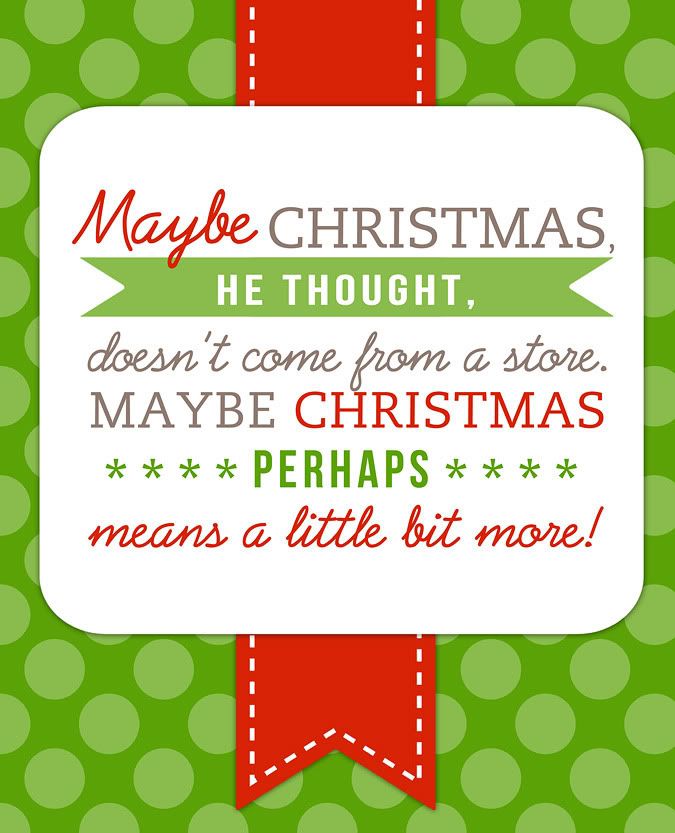
It's a gem to be passed down a generation.  You probably watched as a kid, as I did, and now we can share it with our own!  It's got that classic Christmas theme of a heart changed and a moral/lesson that's heartwarming for everyone to remember:

img source The Cooke Family

My Rating:
This should be fine for any age!  

Your Movie Night: 

Sip on some Grinch Punch 

Grinch Punch via Babble

and enjoy some Grinch Cupcakes!  (They have a heart hidden inside!!!  amazing!)
   
or Grinch cookies :)
 
And use this idea as a bouncing board for your own acts of kindness you can do this year at Christmastime:

Click the picture for more must-watch holiday movies! 

LinkWithin

Related Posts Plugin for WordPress, Blogger...