
If you have somehow made it thus far in your life without indulging in the cinematic greatness that is Casablanca, then I highly highly highly recommend that you watch it as soon as humanly possible. I'm being dramatic . . . but it's that good. It's as epic and romantic and amazing as it's always said to be . . . totally totally lives up to it's hype. So, of course, it's made my list of favorite loves stories.
If you aren't familiar or need a little refresher I found this trailer:
I love so much about this story, the characters are so vivid, the dilemma so sincere. It's not just a love story about Rick and Ilsa, or Ilsa & Victor, it's so much more. It's not a love triangle with a villain, it's a story different kinds of love wrapped up in unfortunate circumstances and set to the backdrop of World War. My husband even loves it! It's a romance movie for someone who doesn't like romance! An old movie for someone who doesn't like old movies! Truly, truly timeless!
So, just about every other line in this movie has become a memorable quote or icon. My favorite is of course:
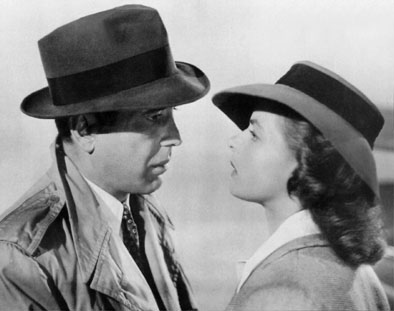
. . . it has total swoon factor.
Supplies:
Glass mug (got mine at the dollar store!)
Glass Etching Cream
Gloves
Paint brush
Contact Paper
Cricut

And that line is the inspiration for the Casablanca-inspired craft project.
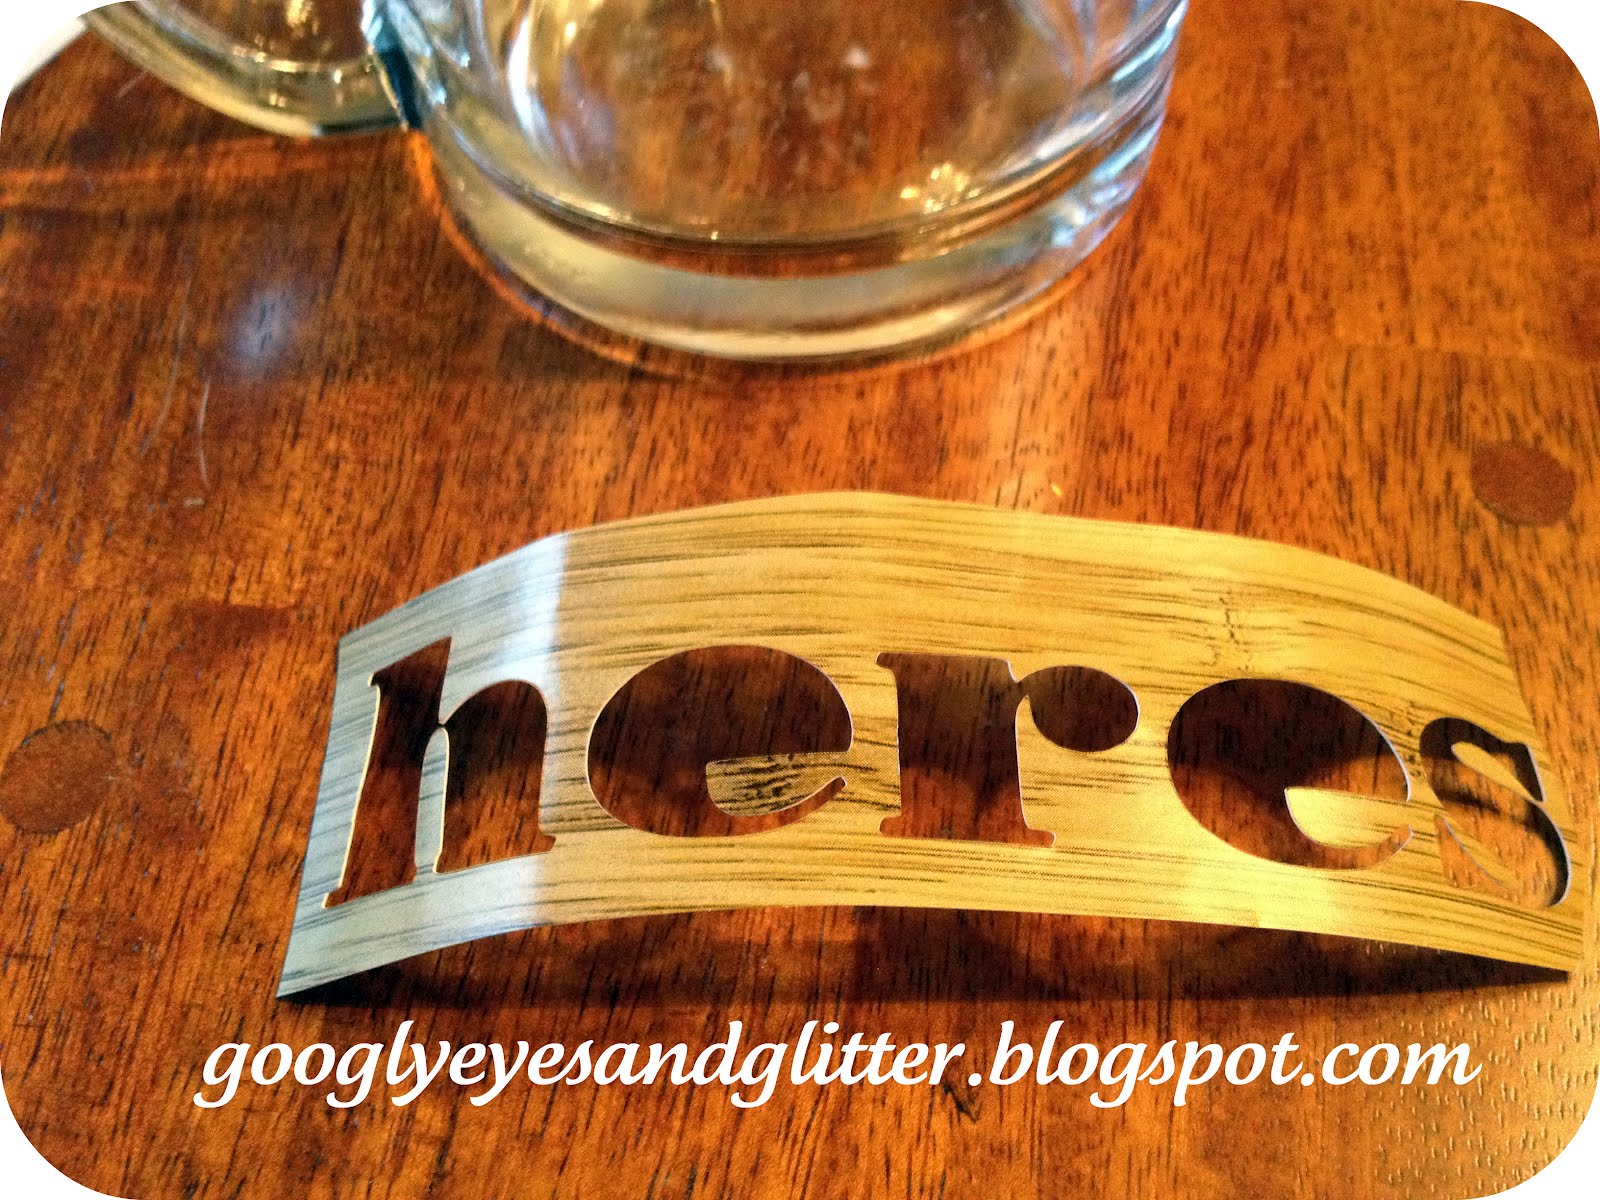
"Here's Looking At You, Kid" Glass Etched MugSupplies:
Glass mug (got mine at the dollar store!)
Glass Etching Cream
Gloves
Paint brush
Contact Paper
Cricut

If you haven't glass etched yet, it is so easy, once you try it you'll want to do it to everything! You can do this to most anything, but I thought sipping your morning coffee with this sweet epic line would be like toasting love! Hooray!I'm linking up with Skip to My Lou, Today's Creative Blog, Schwinn & Schwinn
Using a cricut or other die-cutting machine cut out your letters from the contact paper. Once your letters are cut, you carefully remove them in word groups (I used an Xacto knife to cut out each word before lifting it off the cricut pad).Then place the words and add any hole pieces (i.e. for O's , A's, or E's). Then you fill in any gaps with scraps of the contact paper so that you don't get the etching cream on unintended portions of the glass.
Then apply, wait and rinse off the cream in accordance with the directions on the bottle. I got a little impatient and didn't wait the full 5 minutes :) haha so that's why my etching looks a little uneven. And then you're done! Easy right??


No comments:
Post a Comment