Showing posts with label Valentines Day. Show all posts

Monday, February 17, 2014

wrapping up valentines day

So, crazytown that we're already more than half-way through February!  If time could just slow down a smidge, that'd be great, thanks!  Anyways, slacker me is just now getting to sharing my valentines-y crafties here on the blog!  So BTW, Happy Valentine's Day!  


Y chose a pinterest inspired healthy snack robot to make her class.  They turned out adorable!  Thanks again, pinterest!  


A got to make valentines for her preschool class, and she chose these adorable fox treat holders compliments of my Silhouette.  They of course, had to be lavender.
As a silhouette newbie I couldn't resist adding her name as a cutout to the tail . . . mostly just because I could.  I felt like the addition of googly eyes really brought these little guys to life!  She was so dutiful while helping me glue all the pieces together and was VERY proud passing them out! 


I got my valentine crafty on by making a fun new batch of "I love you like _______"/"I love you more than _______" blocks.  I'm sorta thrilled with how they turned out! 

Monday, January 28, 2013

An Un-Valentine Gift ;) DIY

Now, I totally have some romantic, Valentine-y handmades in the works.  However, before we get to them, I wanted to throw in an "Un-Valentine" gift for those who might not be feeling the ooey-gooey, lovey doveiness of it all :)  Because, who hasn't been there :)  


This is a variation of the potty pops block I posted about last year.  

Here's how I made it:
All you need is a scrap piece of 2"x4" (oh, and also, awesome fyi: if you go the the scrap section of Home Depot they might have some scrap pieces in random lengths, I got several almost 4' lengths of both 2x4 & 1x3 for only 50 cents a board!!), some paints, a drill, and some suckers :)  The paints I used were Martha Stewart Craft Paints in Glossy Beach Glass & Metallic Gold.

I used the font "cream puff" to print out my lettering just on regular computer paper.  Then, taped it over my painted block and traced along the outside of the letters pressing down hard with a pen.  Once the paper is removed, I painted in the indentation with gold.

Depending on the size of your block you can mark where and how many holes you want for suckers along the top.  I didn't drill as horribly crooked as it appears, I merely used too big of a bit so they're leaning against the edge (a look I kinda like :)).

You can sand the block to give it a weathered look and spray with a glossy clear coat for longevity.

Don't share this cynical sentiment but like the pun?  Just add a doesn't into the phrase :)  (maybe even on the back of the block making it reversible for the fickle ;)

Thursday, February 2, 2012

Crafting through My Favorite Love Stories: Helga & Arnold

In honor of Valentine's Day, I decided to revisit my favorite love stories with a creative perspective. Today's story:

Helga & Arnold

If you are not a 90s Nickelodeon child as myself, I can fill you in. Helga was a super poetic-artistic-brainiac and a little nutty girl (but all in secret) with a CRAZY rough, tough big bully and just plain mean exterior :)
She was hilarious, I loved her! She was head over heels in love with the shows title character, Arnold.
I love this story because it really reminds me of the passionate way having an unrequited crush felt during adolescence only exaggerated like 400xs! Oh the drama!

The Projects:
1.Of course, we had to do a Valentine Block. I have to admit, my nerdy husband and I were way too proud of ourselves when we came up with the idea for this block:
All you need is a scrap piece of 2x4, an alphabet stencil and some craft paint!!
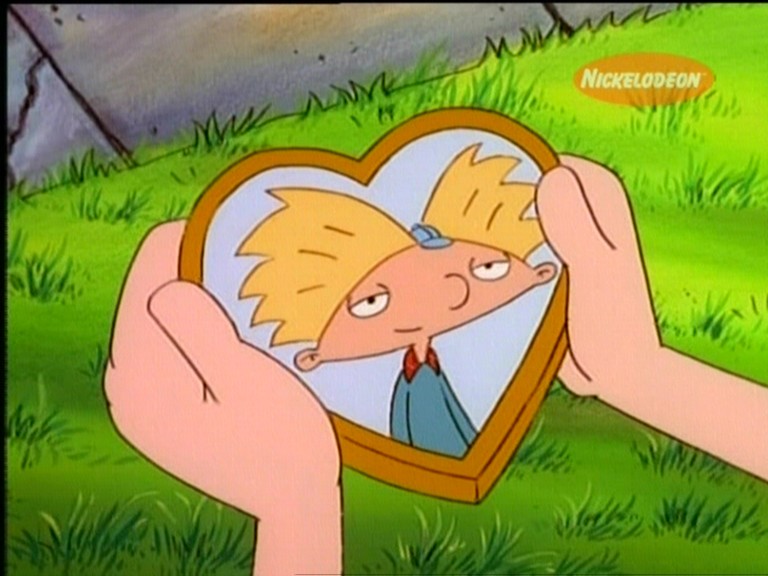
2. A Pin/brooch inspired by Helga's secret heart shaped locket.
I made this using polymer clay, liquid polymer clay, regular printer with matte photo paper, 2 eyepins and a pin back.
To transfer the image you print it on the matte photo paper (seems to work 900xs better than plain printer paper). Then you paint a very thick coating of the liquid sculpey on it and bake according to directions.
While that's baking you can make your "ribbon" topper. I just ran some white clay through my pasta machine and cut a long skinny strip (probably 0.5" x 6") Then using a knife I cut the cute ends and then folded it up like a banner. I impressed the word "love" with the back of a paint brush. I also built up the gap in the back with a little ball of clay.
When the transfer image is done baking you rinse and/or soak it and scrub of the paper (the image stays behind on a fairly translucent and pliable sheet).

Then you place your translucent sheet on top of a heart shaped solid piece of clay and build up the edges with small "snakes" of clay (to be the frame). Before baking I filled in some gaps with the liquid polymer clay as well as used it to glue on the pin back and eye pins.

Once done baking I spray painted the banner and the locket (you'll need to cover your image first). This could be avoided by using colors and metallic clay, but I had white so . . . :)

Then you're finished!! Now, I know Miss Helga wouldn't ever just wear her heart on her sleeve (or chest) like this, but I think it's a fun and festive tribute to romance!! And it's the time of year for that, right?!
Pin It

Want more Helga and Arnold? Hop over and see this cute little montage video someone had made on youtube :)

Stay tuned for another great love story coupled with a cute Valentine-y craft project!!

LinkWithin

Related Posts Plugin for WordPress, Blogger...